
Signal Ops, Not Spam Ops.
Most "AI-powered outbound" advice right now is the same shape. Scrape every job board. Dump every hiring company into a tool. Enrich. Sequence. Send.
It works at volume. It breaks at quality.
If you sell to mid-market and up - where your ICP is maybe 500 accounts, where every touch is a relationship, where one bad email to a VP burns the account for six months - the firehose isn't outbound. It's spam with extra steps.
Broad listening tells you who's hiring. Focused listening tells you when your list moves.
This post has the full stack for the second one - the Zap template, the Clay signal setup, and the classifier prompt.
How The Whole Thing Works.
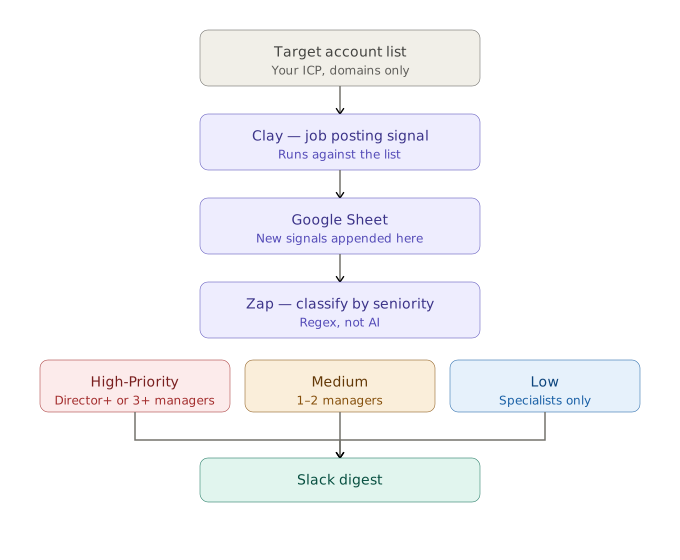
Five pieces. You can build it in an afternoon. The Zap template and the Claude Skill below do most of the heavy lifting - grab them both, then follow along.
1. Build your target account list
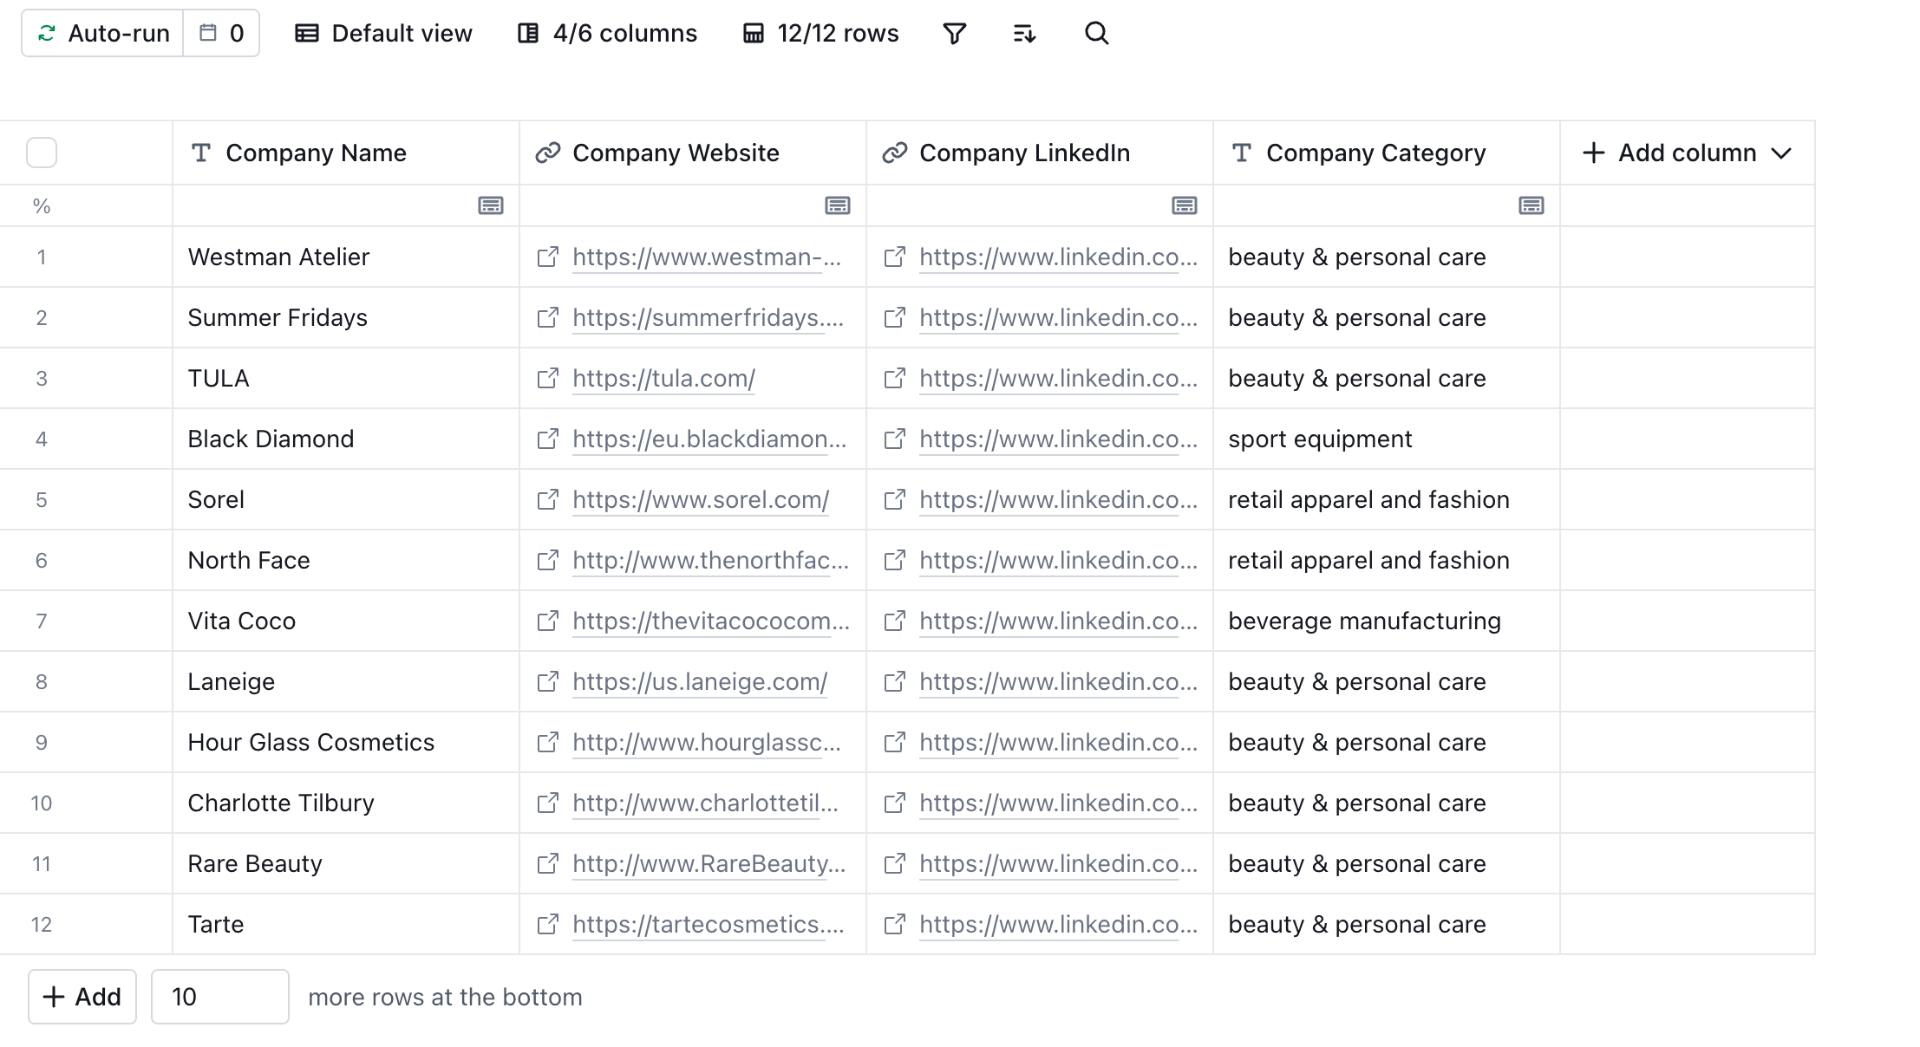
The unsexy step. Before you can listen for signals, you need to know who you're listening to - a curated list of accounts you want to sell to. Domains, not keywords.
For mid-market and up, this is usually 200–800 accounts. Pull them from your CRM or any database of your choice (Apollo; Zoominfo, etc.).
Drop them into Clay as a CSV - one row per company, one column for the domain.
2. Set up Clay's job posting signal
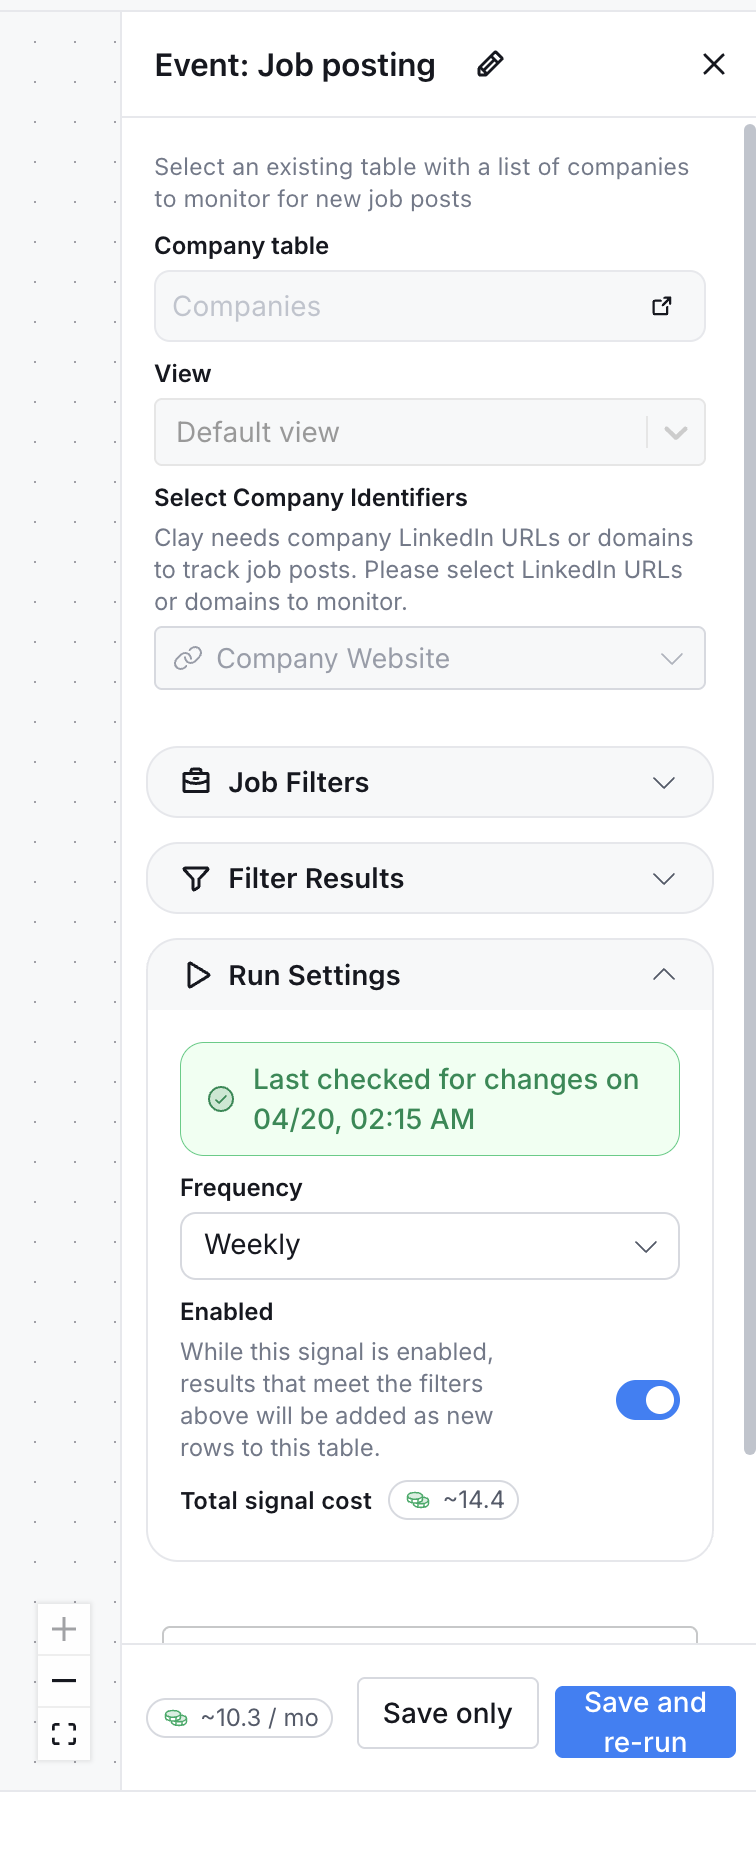
Clay has a native "Event: Job posting" signal. Point it at your target account list, tell it to watch for new roles, and configure how often it runs. Weekly is enough for most ICPs. Daily if you're in a fast-moving market.
Under "Select Company Identifiers," pick domain or LinkedIn URL - whichever Clay enriched best on your list. Under "Job Filters," add seniority/department filters if you only care about certain functions (e.g. only Marketing + RevOps roles).
3. Push signals to a Google Sheet
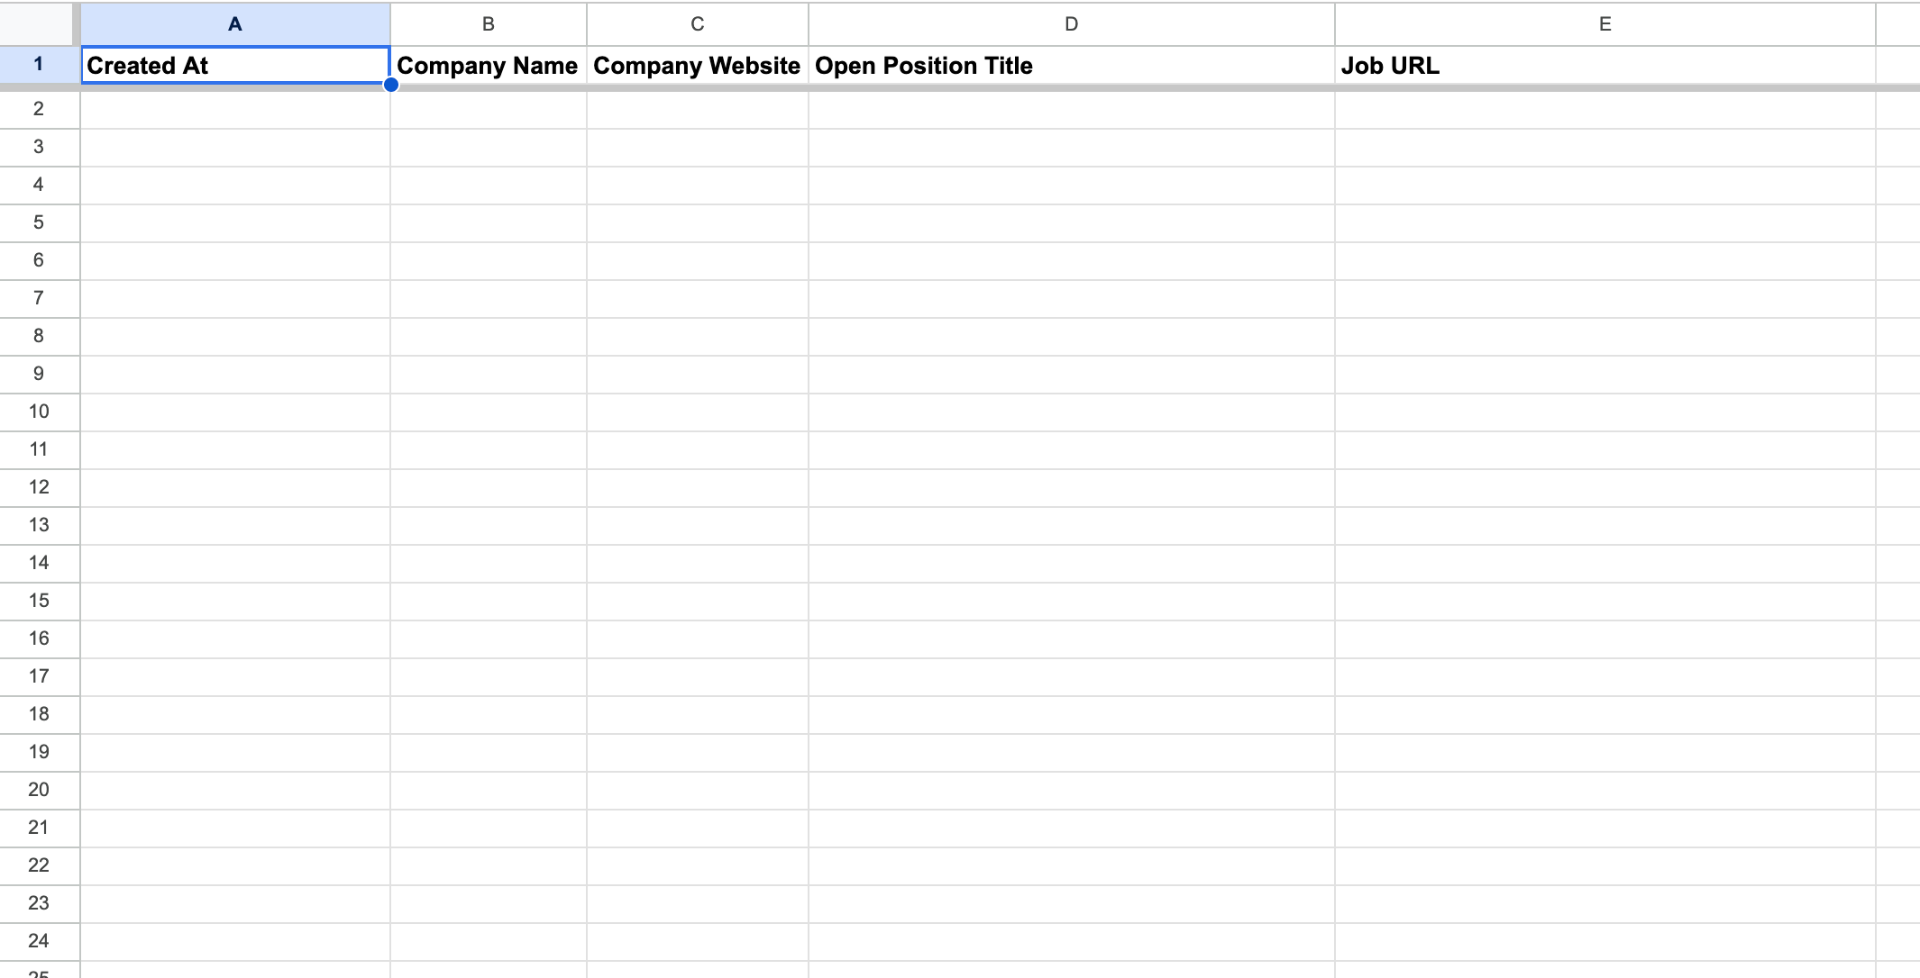
Add a "Push to Google Sheets" action on your Clay table that fires when the job posting signal finds something new. Map these columns in this exact order:
- A: Created At
- B: Company Name
- C: Company Website
- D: Open Position Title
- E: Job URL
The column order matters - the Zap's classifier reads these positionally. If you rearrange them, the Zap will break silently.
4. Install the Zap
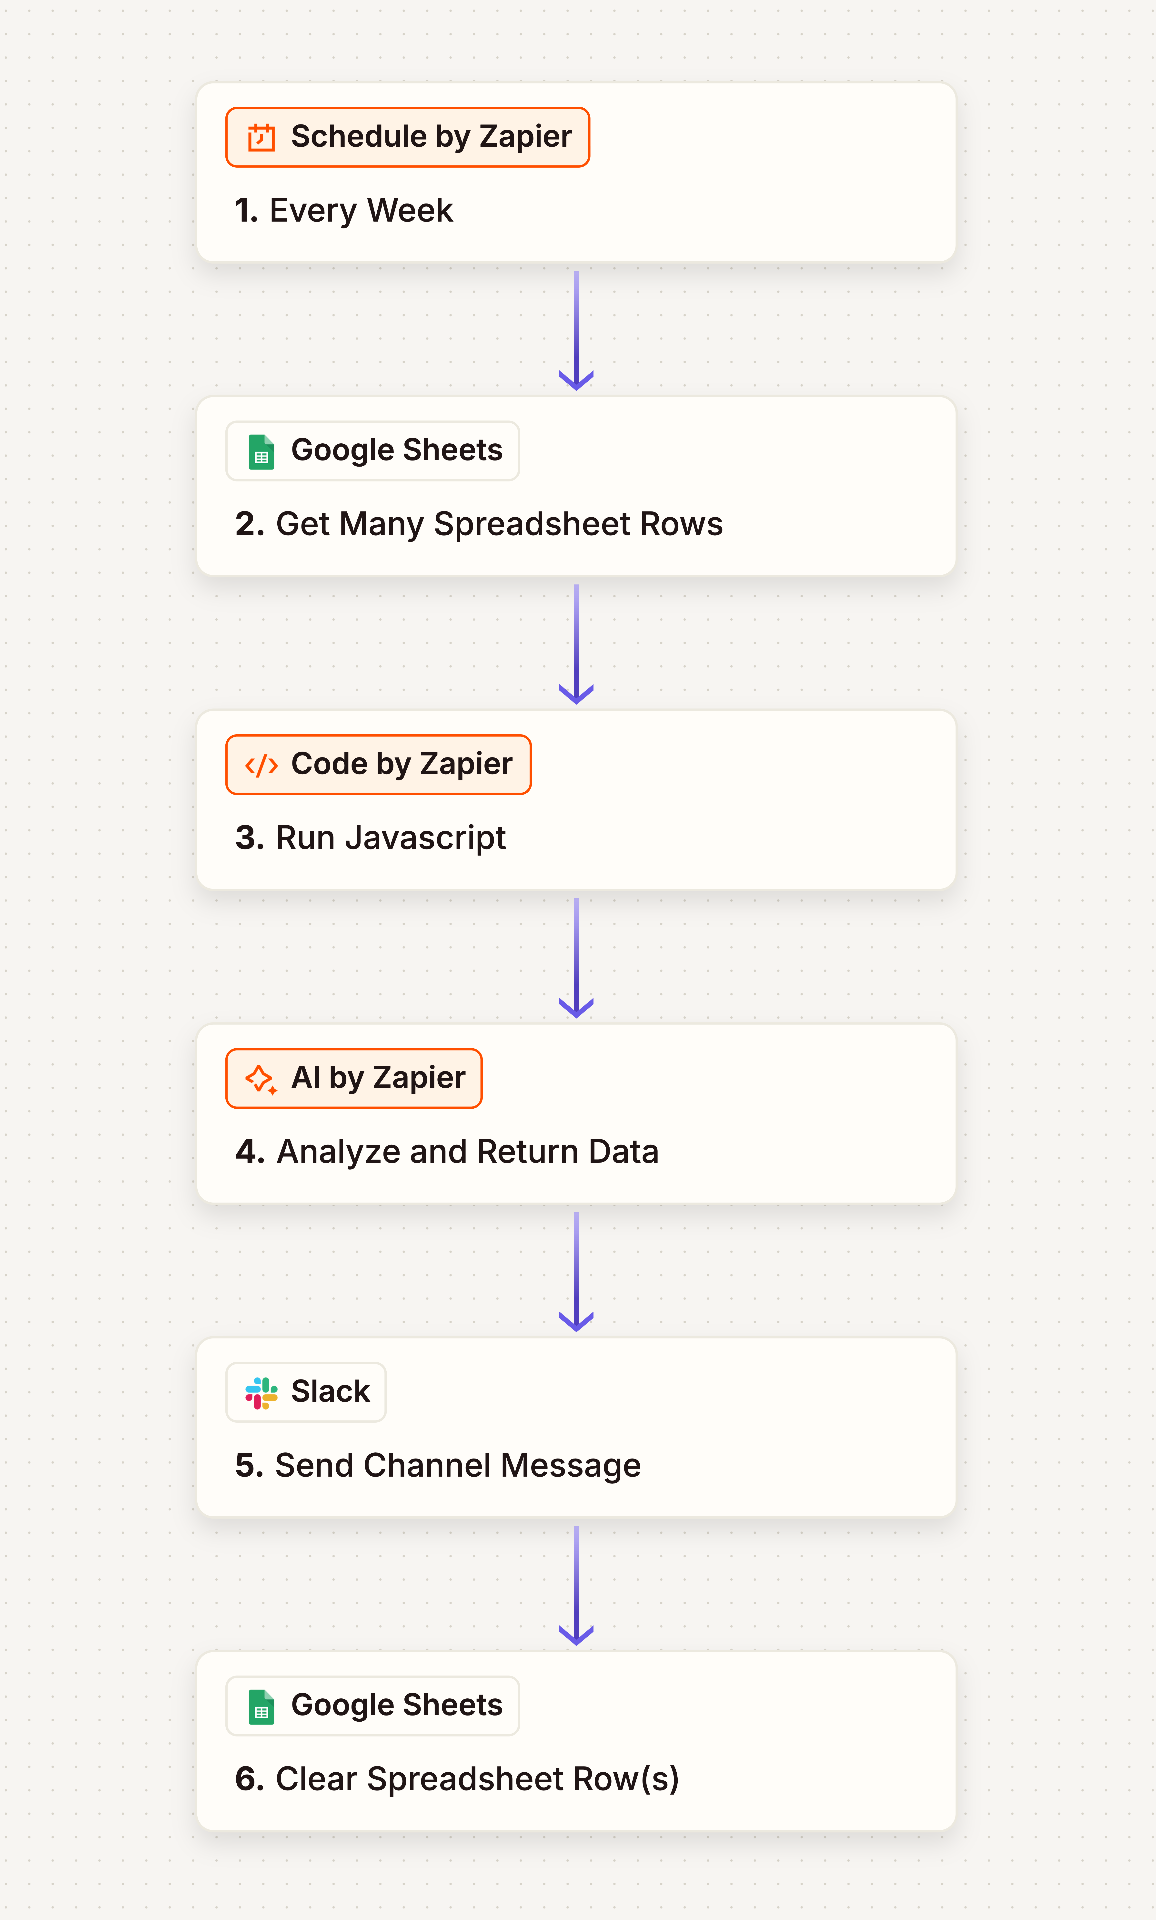
The Zap runs on a schedule you pick (I use Monday 8am), pulls every new row from your sheet, classifies each job by seniority, formats a Slack digest, and clears the sheet so next week starts fresh.
The classification is deterministic regex - not AI. Three tiers:
- High-Priority: Director, VP, or C-suite hire, or 3+ manager-level hires at the same company. Someone got a mandate.
- Medium: 1-2 manager-level hires. Operational expansion.
- Low: Specialist or coordinator roles only. Backfill, low intent.
AI only writes the final Slack formatting. It doesn't decide what matters - because the moment you let AI decide what matters, you lose the thing you built this for.
5. Customize the AI prompt
The Zap ships with a placeholder prompt. Before you run it, edit two things in Step 4 of the Zap:
- Company context: Replace the placeholder with who you are and who you serve.
- Brand list: Replace the placeholder list with your own target accounts - the list should match the domains in your source sheet.
Leave the formatting rules, signal tiers, and structure sections alone. Test the Zap manually once before turning it on to make sure the Slack output reads correctly.
The Automation's Job Is To Tell You Where To Look.
That's the whole philosophy. Everything upstream of the Slack digest is automated so you can spend your time on the only part of outbound that still moves the needle at mid-market and above: being actually, genuinely, non-generically relevant.